Integration Guide
Overview
The Humly integration forwards sensor measurements from Haltian IoT to the Humly Control Panel API so that Humly can display sensor data - temperature, humidity, CO2, occupancy/motion, and presence - against its rooms and desks. Haltian’s connector service pushes data one way, from Haltian IoT to Humly; Humly does not call back into Haltian IoT. The integration is multi-tenant: each Haltian organization has its own connection to a Humly Control Panel instance.
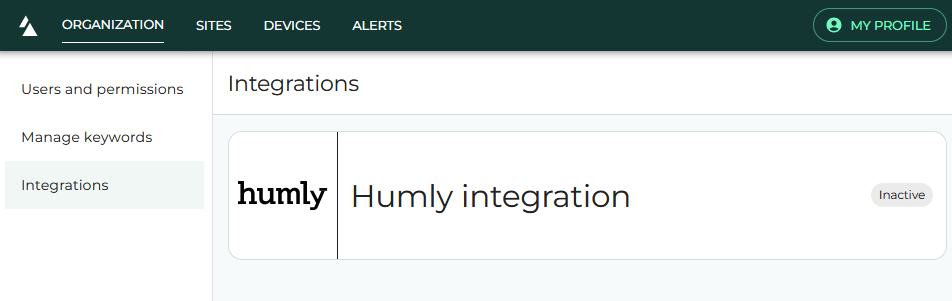
Haltian Support enables the integration for your organization. Once enabled, a user with the manager role configures and manages the connection in Haltian Studio.
| Task | Responsible Party |
|---|---|
| Enable the Humly integration for the organization | Haltian Support |
| Create the connection - base URL, username, description, and password in one form | Customer (manager role) |
| Rotate the password, pause/resume/delete the connection | Customer (manager role) |
| Onboard sensor devices and confirm they report supported measurement types | Customer |
| Map synced sensors to rooms or desks | Customer (inside Humly’s own product) |
| Monitor sensor data delivery | Customer + Haltian |
Prerequisites
- A Humly Control Panel instance reachable over HTTPS. The base URL must start with
https://and must not have a trailing slash. - A Humly Control Panel username and password with permission to create and manage sensors.
- A Haltian IoT organization with sensor devices already onboarded and reporting one of the supported measurement types (see Supported Sensors).
- The Humly integration feature enabled for your organization, and a user account with the manager role in that organization. Only one Humly connection is allowed per organization.
Step 1: Enable the Humly Integration (Haltian)
Contact Haltian Support to enable the Humly integration for your organization. Haltian enables the required feature before you can create a connection.
Step 2: Create the Integration Connection (Customer)
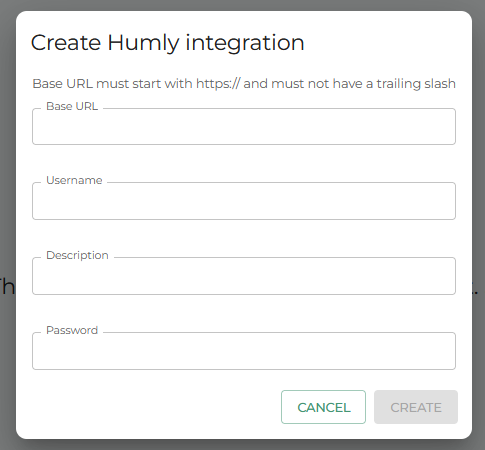
Once the feature is enabled, a user with the manager role opens Haltian Studio and fills in one form with the Humly Control Panel base URL, a Humly username, a description, and the Humly account password, then submits it. The password is encrypted before storage. On submit, Haltian Studio creates the connection and sets its password, and if that succeeds it immediately marks the connection active - so a successful create takes you straight to an active connection with no separate activation step. If setting the password fails, the connection is marked error instead, and can be recovered by rotating the password.
Step 3: Verify the Connection
Confirm the connection state is active. The other possible states are:
| State | Meaning |
|---|---|
pending | Connection exists but hasn’t finished authenticating yet - normally only seen briefly, not after a successful create |
active | Authenticated and forwarding data |
paused | Temporarily not forwarding data |
error | Authentication or delivery is failing - includes a newly created connection whose password setup failed |
disabled | Connection has been turned off |
If the state is anything other than active, see Troubleshooting below.
Step 4: Confirm Sensor Data Reaches Humly
Once the connection is active, Haltian IoT automatically creates a sensor entry in Humly for each device reporting a supported measurement type. Supported measurement types map to Humly sensor types as follows:
| Haltian measurement type | Humly sensor type |
|---|---|
| Ambient temperature, system temperature | Temperature |
| Humidity | Relative humidity |
| Barometric pressure | Pressure |
| CO2 | CO2 |
| Occupancy status, movement detections, directional movement | Motion |
| Presence | Presence |
Any measurement type not in this list is not forwarded to Humly. Newly created sensors appear in Humly as unassigned - they are not yet linked to any room or desk.
Step 5: Map Sensors to Rooms or Desks (Customer)
Assigning a synced sensor to a specific room or desk is done entirely inside Humly’s own Control Panel product, not in Haltian Studio. Haltian IoT does not currently offer a way to pre-configure or manage this mapping - sign in to your Humly Control Panel and assign each unassigned sensor to the room or desk it belongs to.
Troubleshooting
Connection State Shows “error”
- Confirm the Humly base URL starts with
https://and has no trailing slash. - Confirm the Humly username and password are correct and that the account has permission to create sensors.
- Contact Haltian support to review the connection.
Connection Was Created but Shows “error” Instead of “active”
- This means the connection record was created but setting its password failed - the create form submits both together, so this shows up as a single failed create rather than a connection stuck without a password.
- Use “rotate password” to retry setting the password; if it succeeds, the connection is reactivated automatically.
- Confirm the Humly base URL, username, and password are correct and that the account has permission to create sensors.
Sensors Not Appearing in Humly
- Confirm the device is reporting one of the supported measurement types listed in Step 4. Unsupported measurement types are not forwarded.
- Confirm the connection state is
active. Sensor data is not created or updated while the connection ispaused,error, ordisabled. - Check that the device has recent activity in Haltian Studio.
Sensor Data Looks Stale
- Check the device’s connectivity and last-seen timestamp in Haltian Studio.
- Confirm the connection state is
active- apausedconnection stops forwarding new readings until it resumes.
Sensor Appears in Humly but Isn’t Linked to a Room or Desk
- This mapping is done manually inside Humly’s Control Panel, not by Haltian IoT. Sign in to Humly and assign the sensor to the correct room or desk.
Support
- Humly Control Panel: Contact Humly support for questions about the Humly product itself, including room and desk mapping.
- Haltian Integration: support@haltian.com
Next Steps
- Supported Sensors - Which sensors and measurement types work with the Humly integration
- FAQ - Common questions about the integration