HITS Installation Planning
Overview
This guide covers how to plan and deploy the complete Haltian Inventory Tracking Solution (HITS) infrastructure across a facility. It explains the spatial rules for placing gateways, EH Locators, and NANO Tags to achieve optimal inventory tracking and positioning accuracy.
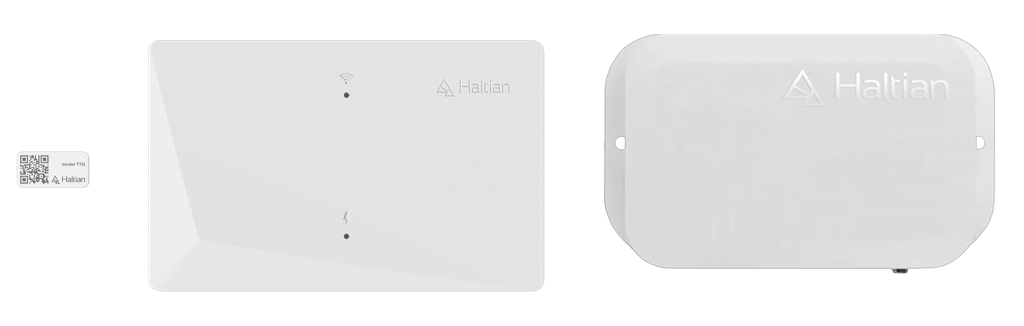
For individual device mounting instructions, see:
Prerequisites
Before installing infrastructure devices:
- Organization active — your Haltian IoT organization is set up and devices are ordered/delivered
- Haltian Field application is installed (runs on Android devices, iPhone, or iPad)
- Site setup plan prepared for your premises — which spaces are equipped with HITS (sites, floors, rooms), and planned locations for gateways, locators, and tags
- Devices on hand:
- Haltian IoT Gateways with sales box contents
- Haltian EH Locators with sales box contents
- Haltian NANO Tags with sales box contents
- PoE-USB-C adapters for EH Locators (if applicable)
- Installation tools:
- Android device, iPhone, or iPad with Haltian Field
- Ladders or lifter for ceiling-level EH Locator installation
Key Terminology
| Term | Definition |
|---|---|
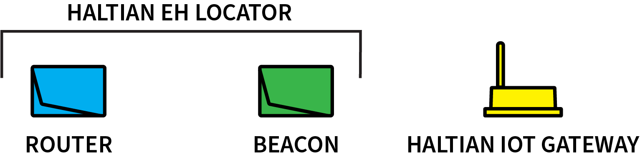
| Router | EH Locator operating mode that routes messages to and from the gateway. Can harvest energy from indoor light or be powered via USB-C. |
| Beacon | EH Locator operating mode that does not route messages, but increases tag positioning accuracy. |
| Locator Grid | The recommended maximum distance between EH Locators that together cover a specific area. |
| Shared Wall | A light wall separating spaces that does not fully block the wireless signal. |
| Site | Highest level in the hierarchy (e.g., a campus). |
| Building | One site can include several buildings. |
| Floor | A building can have several floors. |
| Room | The largest individual unit of a floor covered with inventory and positioning infrastructure. |
| Zone | A specific area inside a room, defined in the application. Does not need dedicated EH Locators in the corners. |
General Installation Rules
Clearances and Grid Spacing
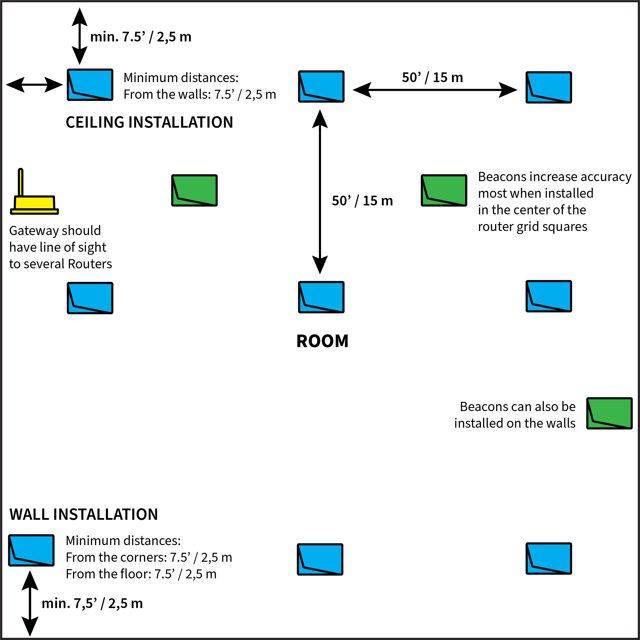
- Ceiling installations — maintain a minimum of 2.5m (7.5 ft) clearance between walls and the EH Locator
- Wall installations — maintain a minimum of 2.5m (7.5 ft) distance from the floor and from corners
- Locator grid — EH Locators can be spaced up to 15m × 15m (50 ft × 50 ft). Larger grids are possible but may reduce positioning accuracy, especially when reflective objects are present.
- Height — best performance is achieved when EH Locators are placed higher than other elements in the room (e.g., above shelf tops)
Gateway Placement
Place the Haltian IoT Gateway close to the densest area of routers — where several EH Locators can connect directly to the gateway with line of sight.
Rule of thumb: the gateway should have line of sight to a few router-mode EH Locators.
Improving Positioning Accuracy
To achieve more accurate positioning within a grid, add EH Locators in beacon mode to the center of the grid or on the walls. Beacon-mode locators do not route messages but provide additional reference points for tag positioning.
Router and beacon modes are configured using Haltian Field.
Room Layout Examples
Large Hall with Short Metal Shelves
For data halls or storage rooms with metal shelves:
- Place router-mode EH Locators at the grid corners (ceiling or high wall mount)
- Add beacon-mode EH Locators to improve positioning accuracy within the grid
- Choose locations where powering is reasonably simple
- EH Locators should be mounted more than 30cm (1 ft) higher than other objects on the floor
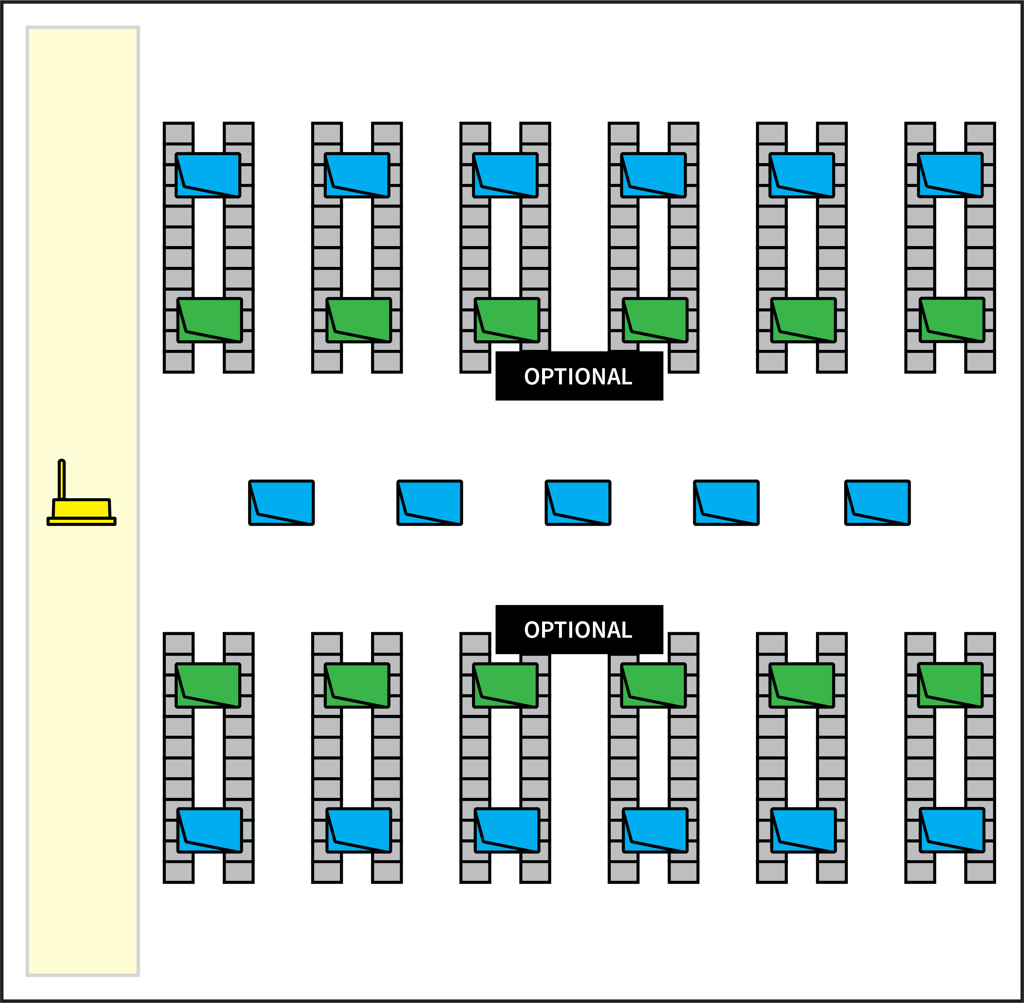
The gateway does not need to be at the edge of the room. It can be placed anywhere within the coverage area as long as it has line of sight to several router-mode EH Locators.
Small Room with Short Metal Shelves
For small storage rooms (~100 m² / ~1,075 sq ft):
- Place router-mode EH Locators at the room corners
- Add beacons to improve positioning accuracy
- A single gateway is typically sufficient
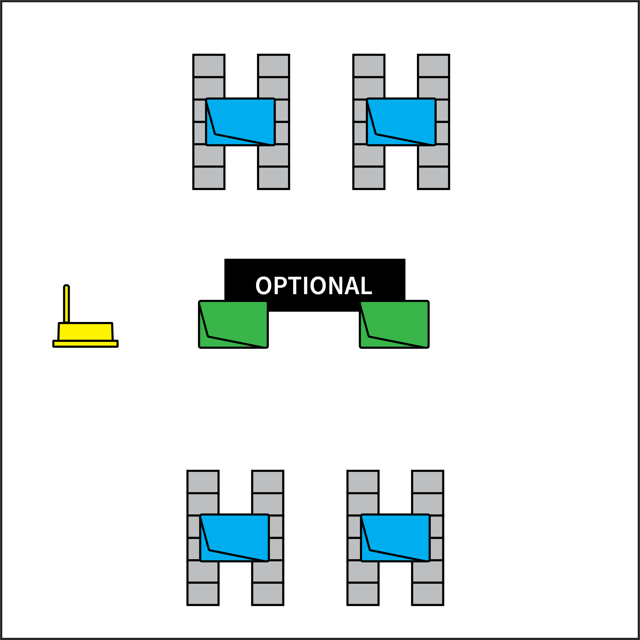
Medium-Sized Open Premises
For open areas (~300 m² / ~3,230 sq ft) such as loading docks:
- Use the standard locator grid spacing
- Add beacon-mode locators to improve positioning accuracy in open areas
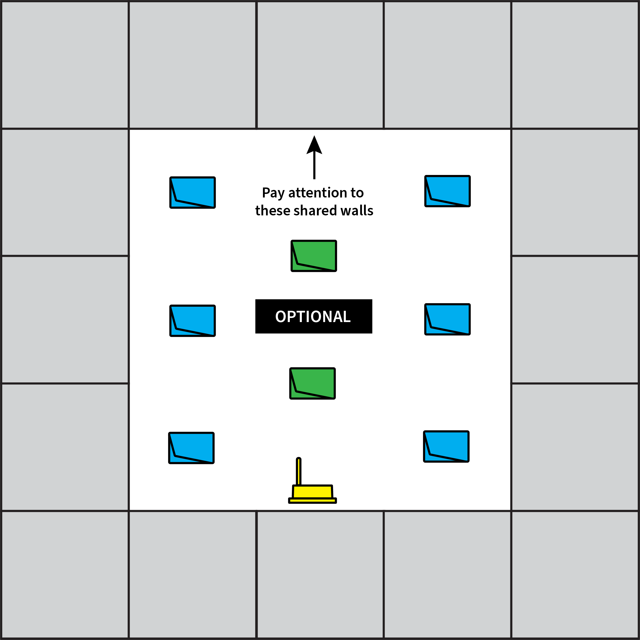
Shared Walls and Adjoining Rooms
Shared Walls Between Zones
Thin dry walls can create challenges when different zones are on each side. Follow these principles:
- Ceiling-mounted locators — maintain approximately 2.5m (7.5 ft) clearance on both sides of the shared wall
- Wall-mounted locators — install on only one side of the shared wall, not both sides
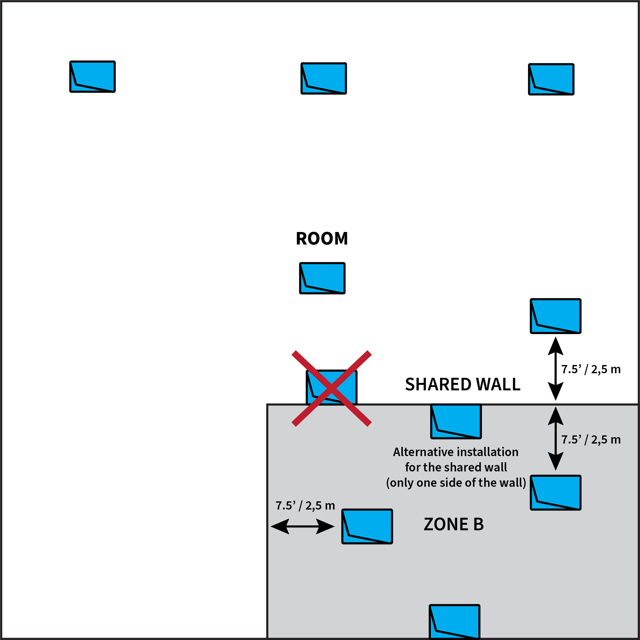
Adjoining Rooms
When connecting two rooms to the same gateway:
- Ensure more than one router-mode locator can transmit messages between the rooms
- In general, it is recommended to use a dedicated gateway in each room for reliable connectivity
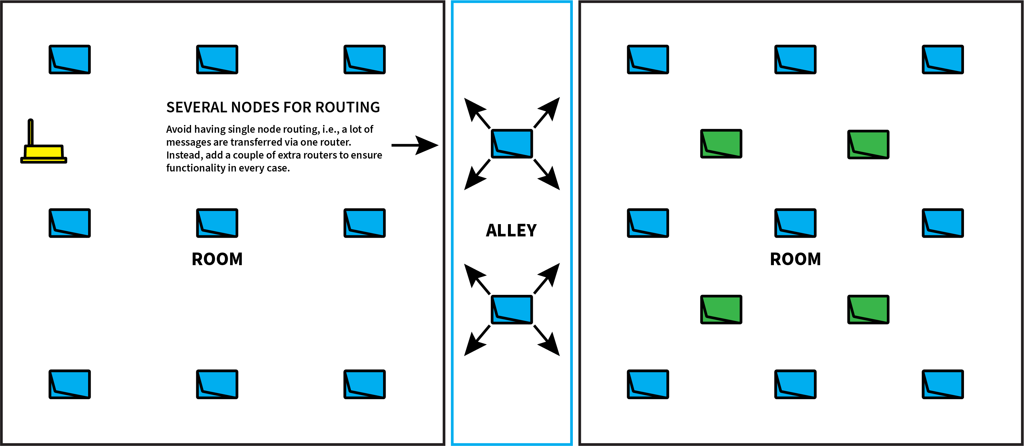
Things to Avoid
❌ Do NOT:
- Install EH Locators on opposite sides of the same shared wall
- Block devices with surrounding metal surfaces (locators, tags, or gateway)
- Create excessive distances between EH Locators, tags, or gateway
- Install near high-power RF transmitters (WiFi routers or similar)
- Expose to wet conditions (dripping, splashing, or spraying water)
- Install in excessively dusty environments
- Exceed the recommended operating temperature of +50°C
- Install on greasy or dirty surfaces

Installation Workflow
Once site planning is complete, install devices in this order:
- Gateway first — install and verify the Haltian IoT Gateway is online and connected to IoT Center
- Router-mode EH Locators — install at grid corners, verify mesh network establishment (green Network LED)
- Beacon-mode EH Locators — install additional positioning reference points, configure beacon mode in Haltian Field
- NANO Tags — attach to assets and verify they appear in Haltian Field
Use Haltian Field to monitor the installation progress — verify each device comes online, check signal strength, and confirm correct operating modes.
Related Documentation
- EH Locator Overview — Device details and specifications
- EH Locator Installation — Physical mounting instructions
- EH Locator Operation — Operating modes, LED states, configuration
- IoT Gateway N8 — Gateway documentation
- NANO Tag — Asset tag documentation
- Location Tracking (RTLS) — Working with position data after deployment