Installation
Video Tutorial
Before Installation
Prerequisites
- Thingsee Gateway is installed and operational (LED blinking green)
- Installation surface is clean and dry
- Plan sensor locations considering measurement types needed
Network Coverage
- Maximum distance: 20m between sensors or to gateway
- Use intermediate sensors as routers for distances > 20m
- Account for signal attenuation from fire doors, thick walls, metal structures, and dense building materials
Sensor Capabilities
Thingsee ENVIRONMENT combines multiple sensor types in one device:

- Temperature / Humidity — Climate monitoring
- Barometric Pressure — Weather tracking, floor detection
- Ambient Light — Occupancy inference, lighting status
- Accelerometer — Vibration/motion detection, position sensing
- Magnetic Switch — Door/window open/close status
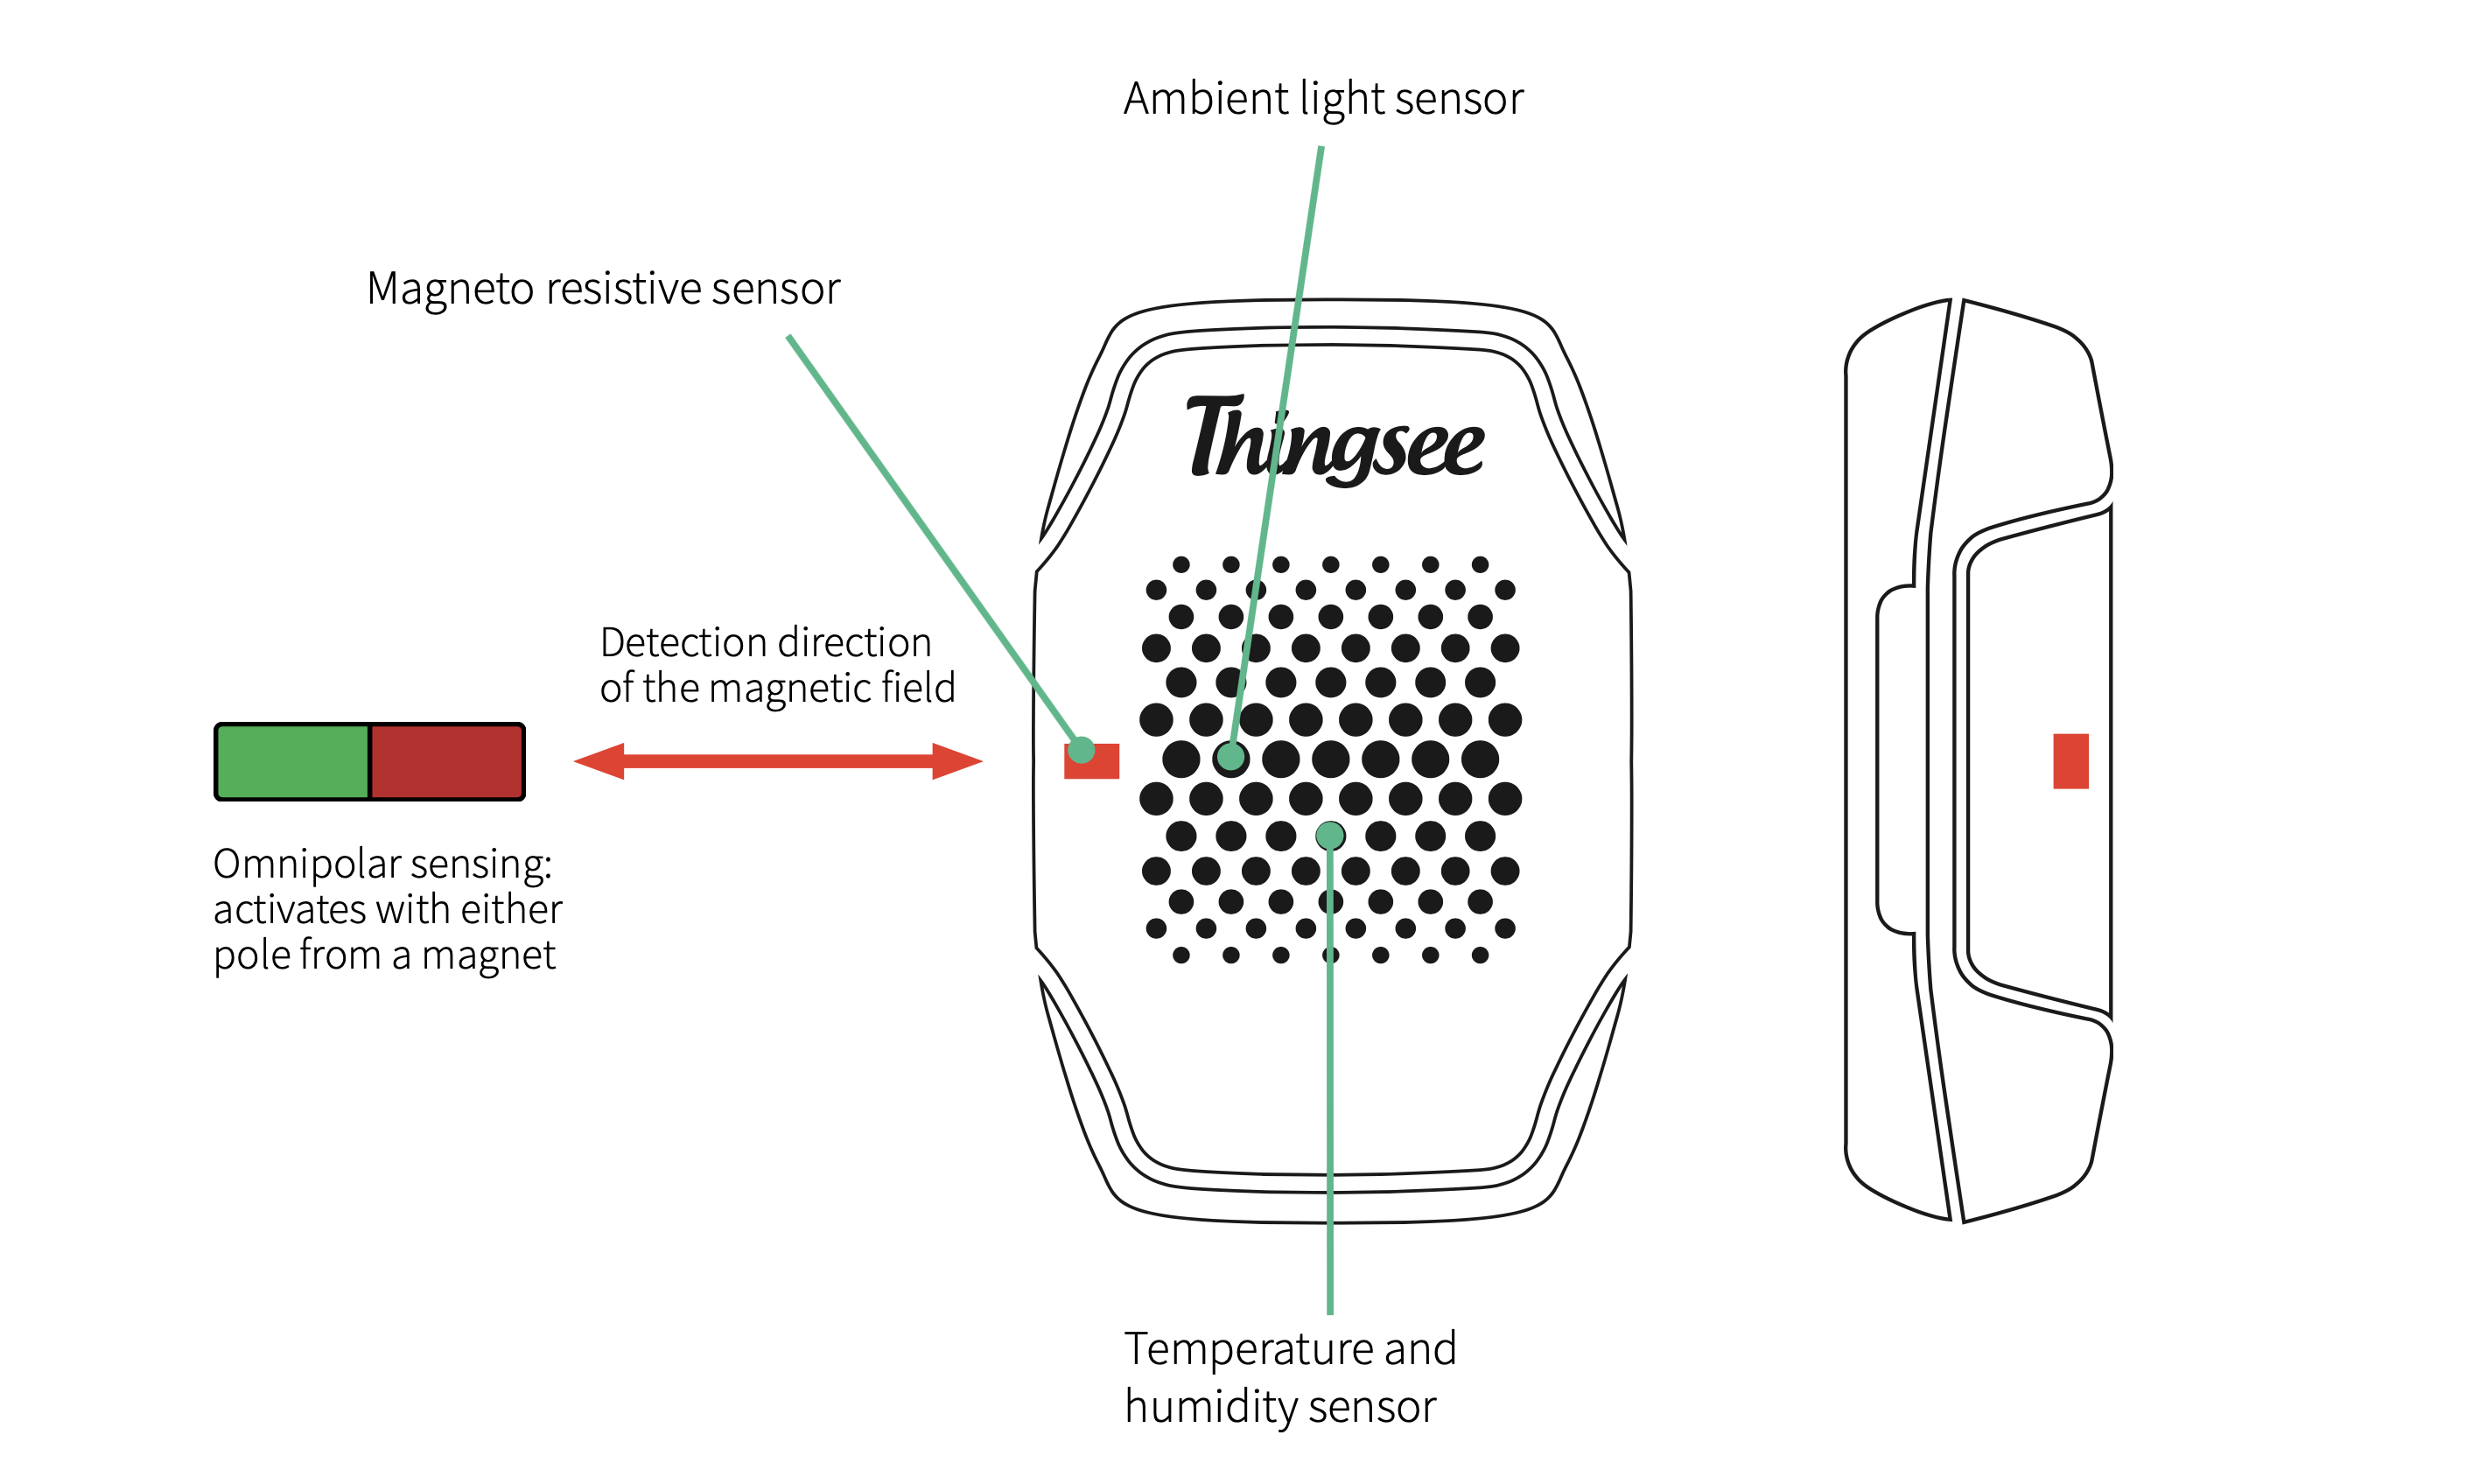
Sensor Component Locations
The sensor components are located on specific sides of the device. Understanding this helps with correct orientation during installation.
Device Identification and Activation
Identify the Sensor
Read the QR code on the front of the device using a QR code reader or the Haltian Field application on your mobile device. Identifying the device helps you keep track of your installation and helps Haltian support solve possible issues.
Activate the Sensor
The sensor ships with batteries pre-installed and a protective battery tab.
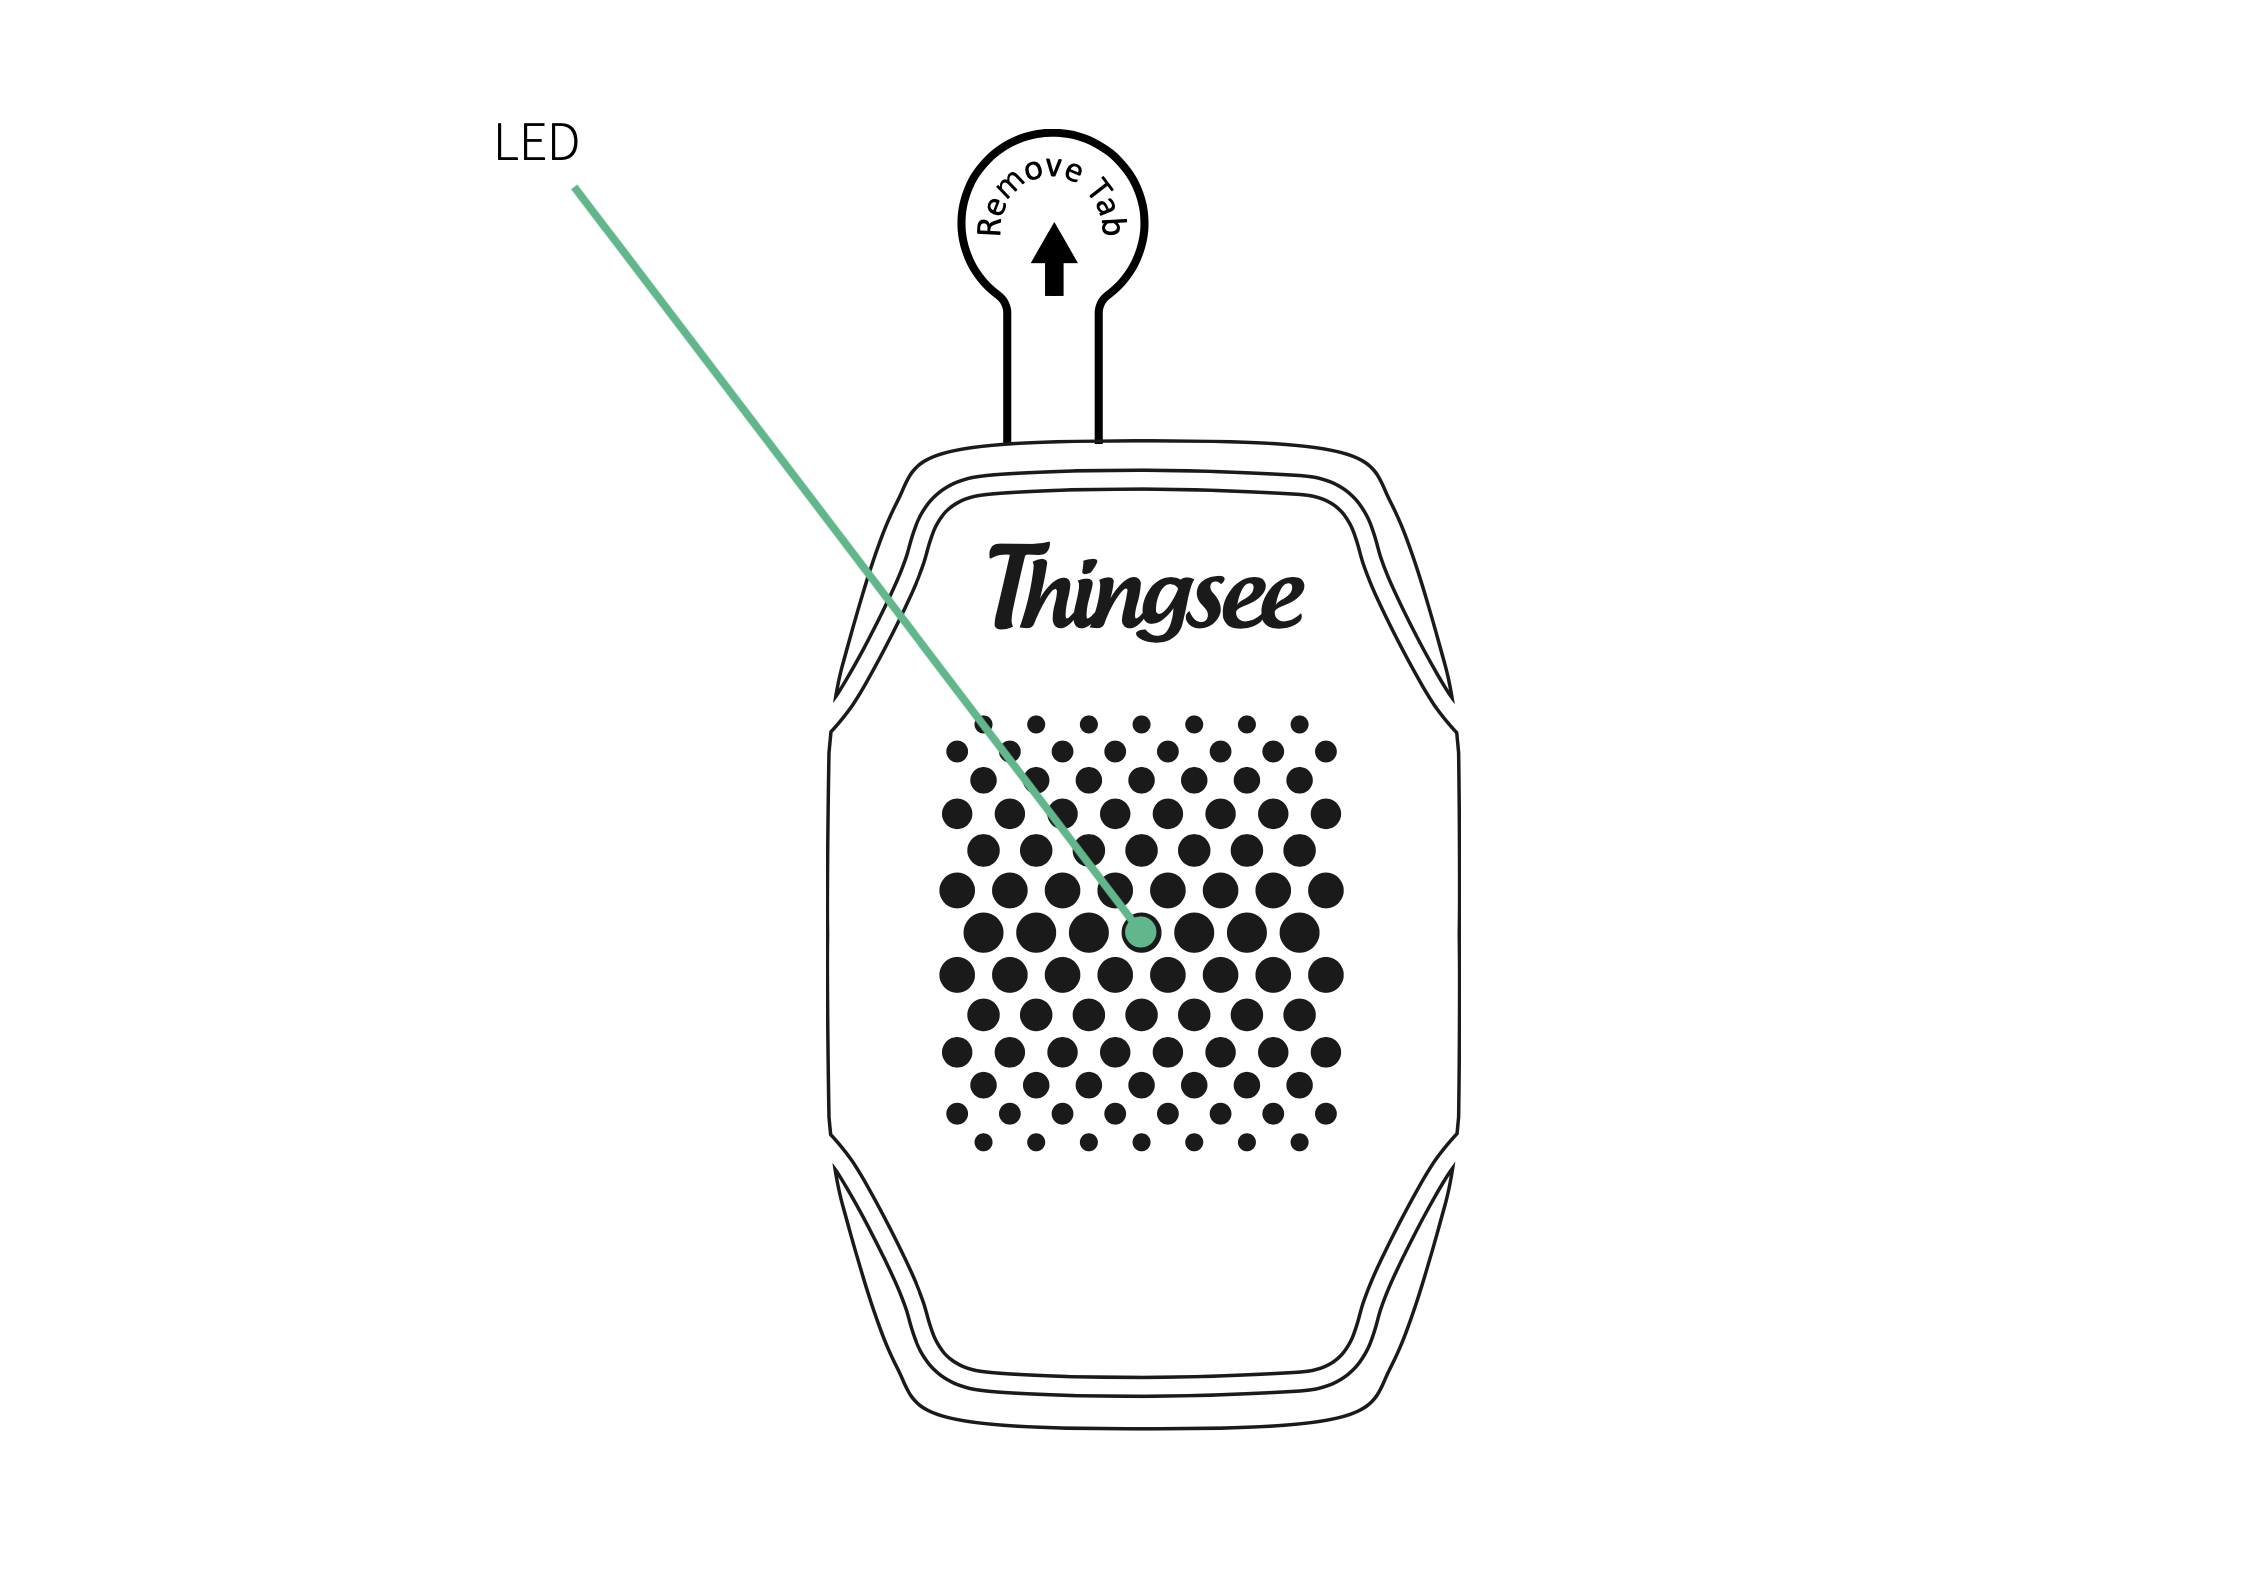
- Carefully pull out the battery security tab
- The LED indicator (red) will flash once to confirm activation
- If the LED doesn’t flash within 2 minutes, tap the sensor against your palm
- If the LED still does not flash, open the sensor and reinstall the batteries (see Battery Replacement)
Before mounting, verify that the installation location is within 20 m of the nearest Haltian device (sensor or gateway) to ensure mesh network connectivity.
Things to Avoid
❌ Direct sunlight or near windows
❌ Near heating/cooling sources or vents
❌ Corners with poor air circulation
❌ Behind doors, furniture, or other obstacles
❌ In cabinets or enclosed spaces
❌ Facing windows when using the light sensor (sun overwhelms room lights)
❌ Distance > 20m to nearest sensor or gateway
Installation
Materials Needed
- Double-sided adhesive tape (foam tape recommended)
- IPA solvent (isopropyl alcohol)
- Clean cloth
Steps
Clean the surface: Wipe with IPA solvent and allow to dry completely
Remove the tape backing from the backside of the sensor
Attach the sensor by pressing it firmly against the surface for a minimum of 5 seconds
Install the sensor max. 20 meters from the next sensor or gateway to ensure full mesh network coverage.
Placement by Use Case
Environment Monitoring
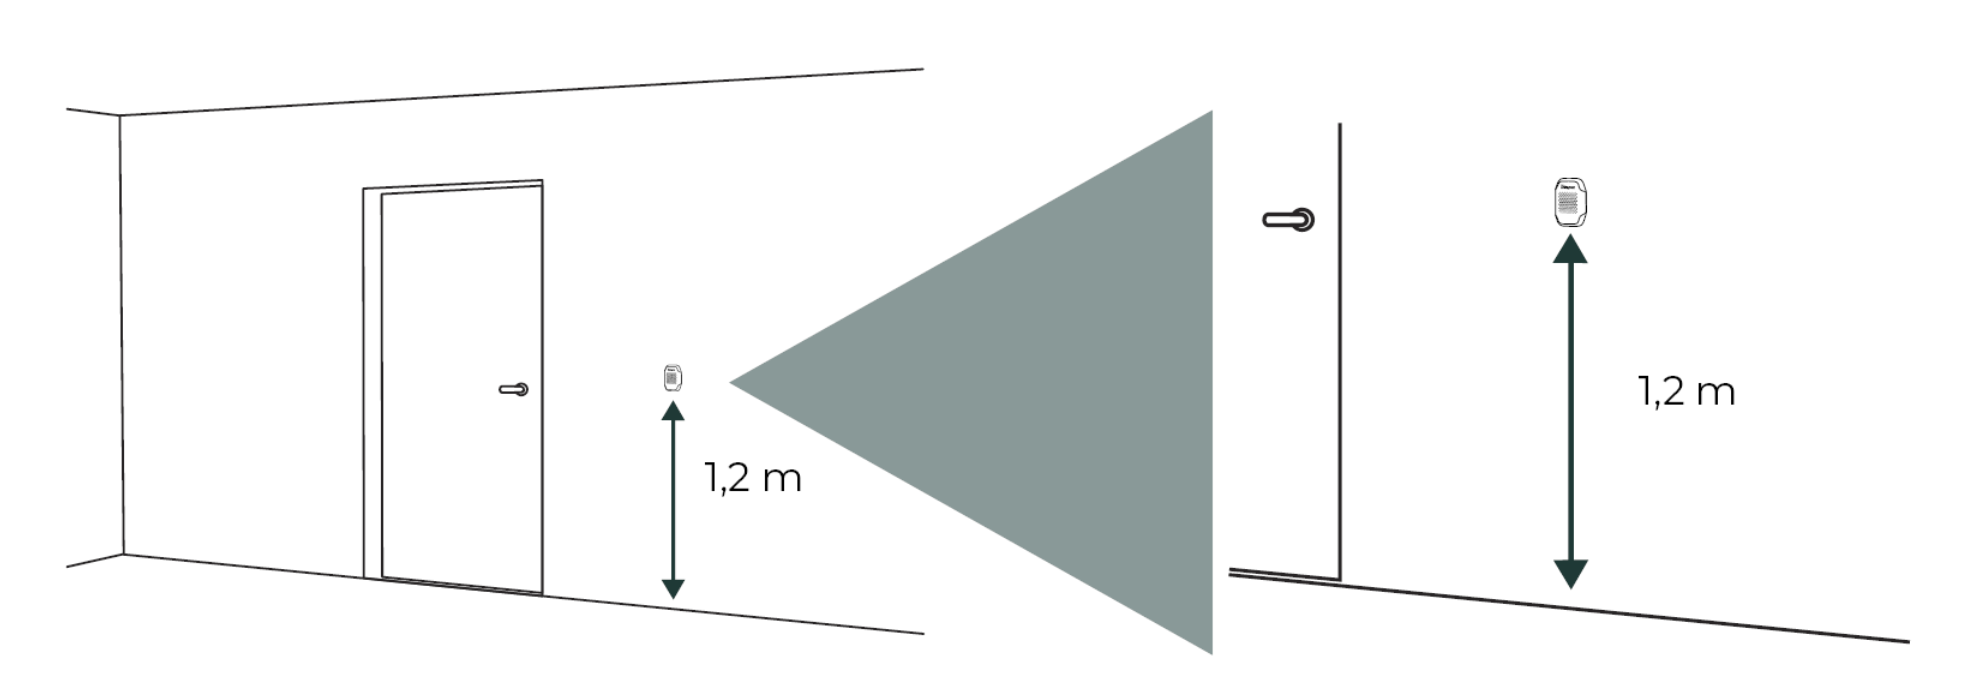
For monitoring temperature, humidity, air pressure, and light levels, install the sensor on a wall at 1.2 m height. Depending on the use case, a height between 1.2–1.8 m is acceptable.
Good Placement
✅ Representative of room conditions
✅ Central location or along walls
✅ Away from direct airflow
✅ Accessible for battery replacement
✅ Sensor face pointing toward general room lighting (for light sensing)
Door and Window Monitoring
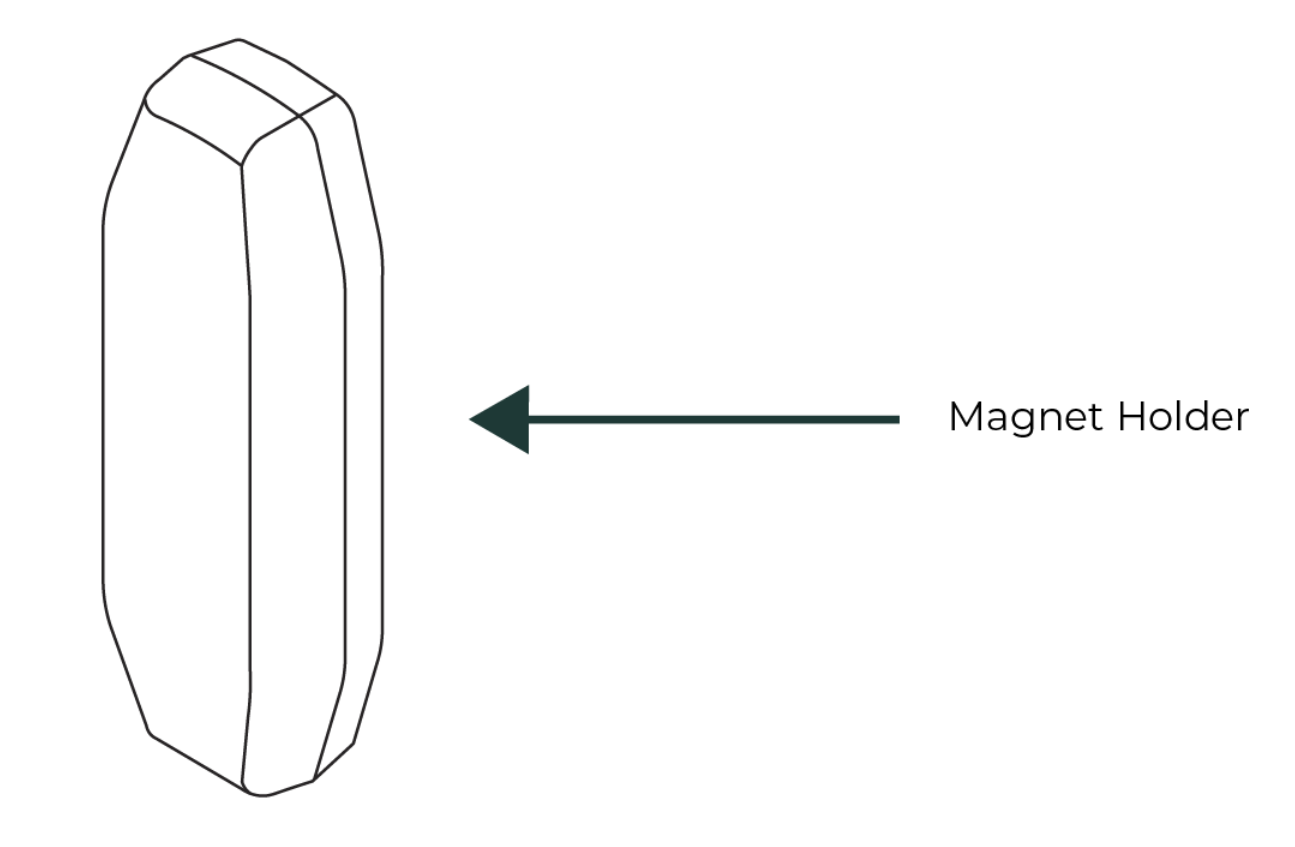
Thingsee ENVIRONMENT monitors doors and windows using the magnet holder accessory. The sensor is attached to the frame (stationary part), and the magnet holder is attached to the door or window (moving part). When the door or window is closed, the sensor detects the magnet.
Installation Steps
- Install the sensor on the door or window frame using adhesive tape
- Attach the magnet holder to the door or window (moving part) using adhesive
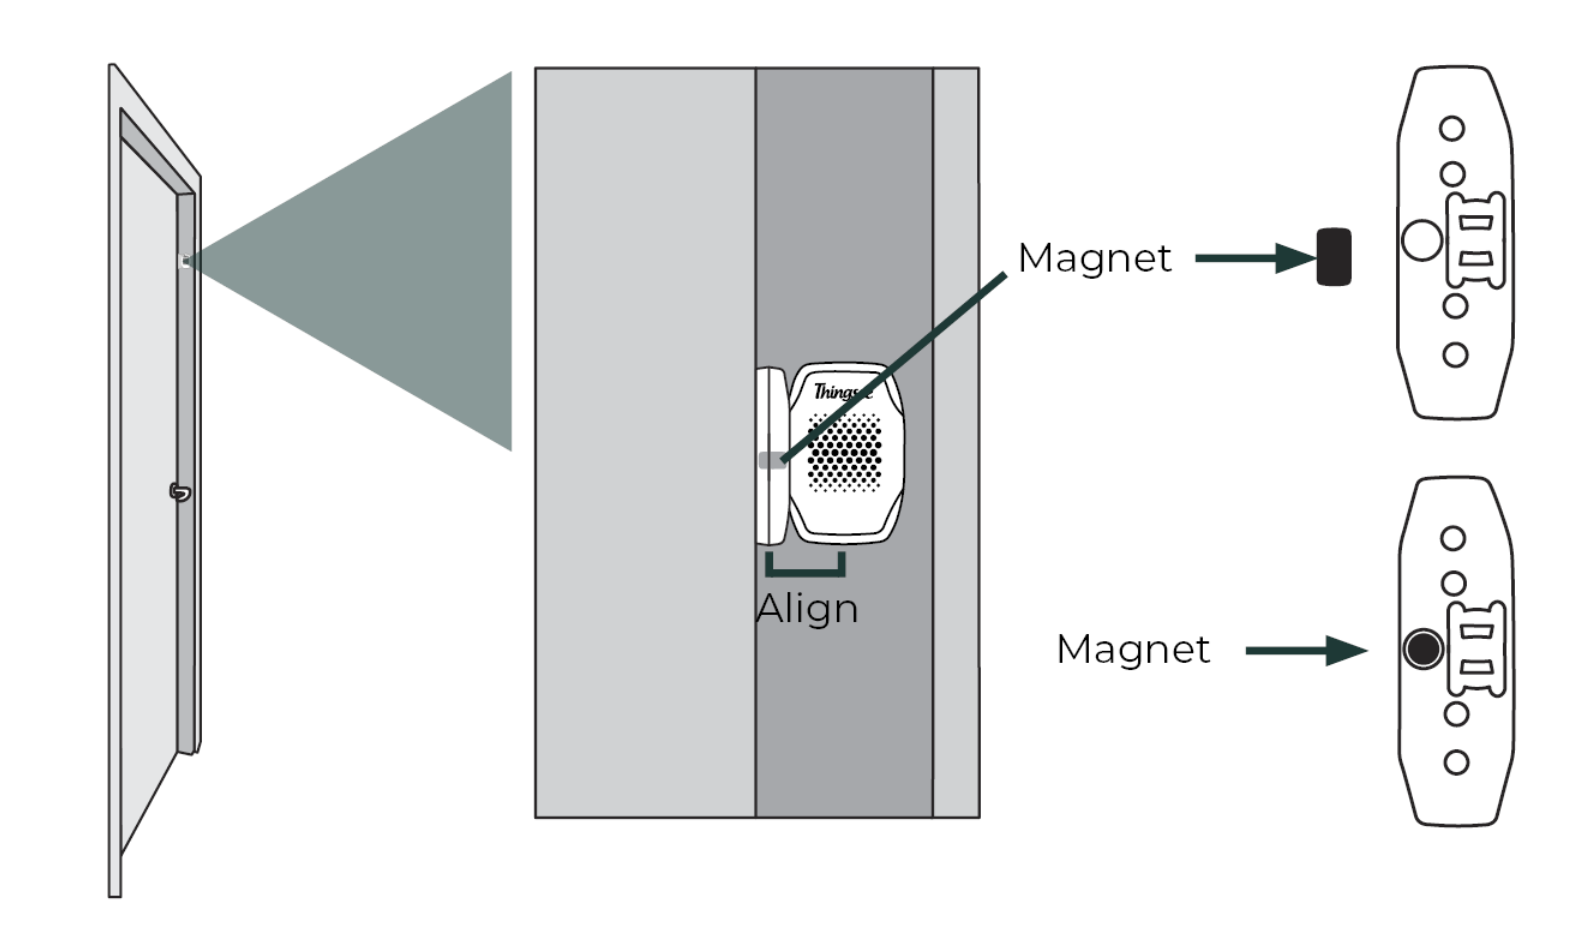
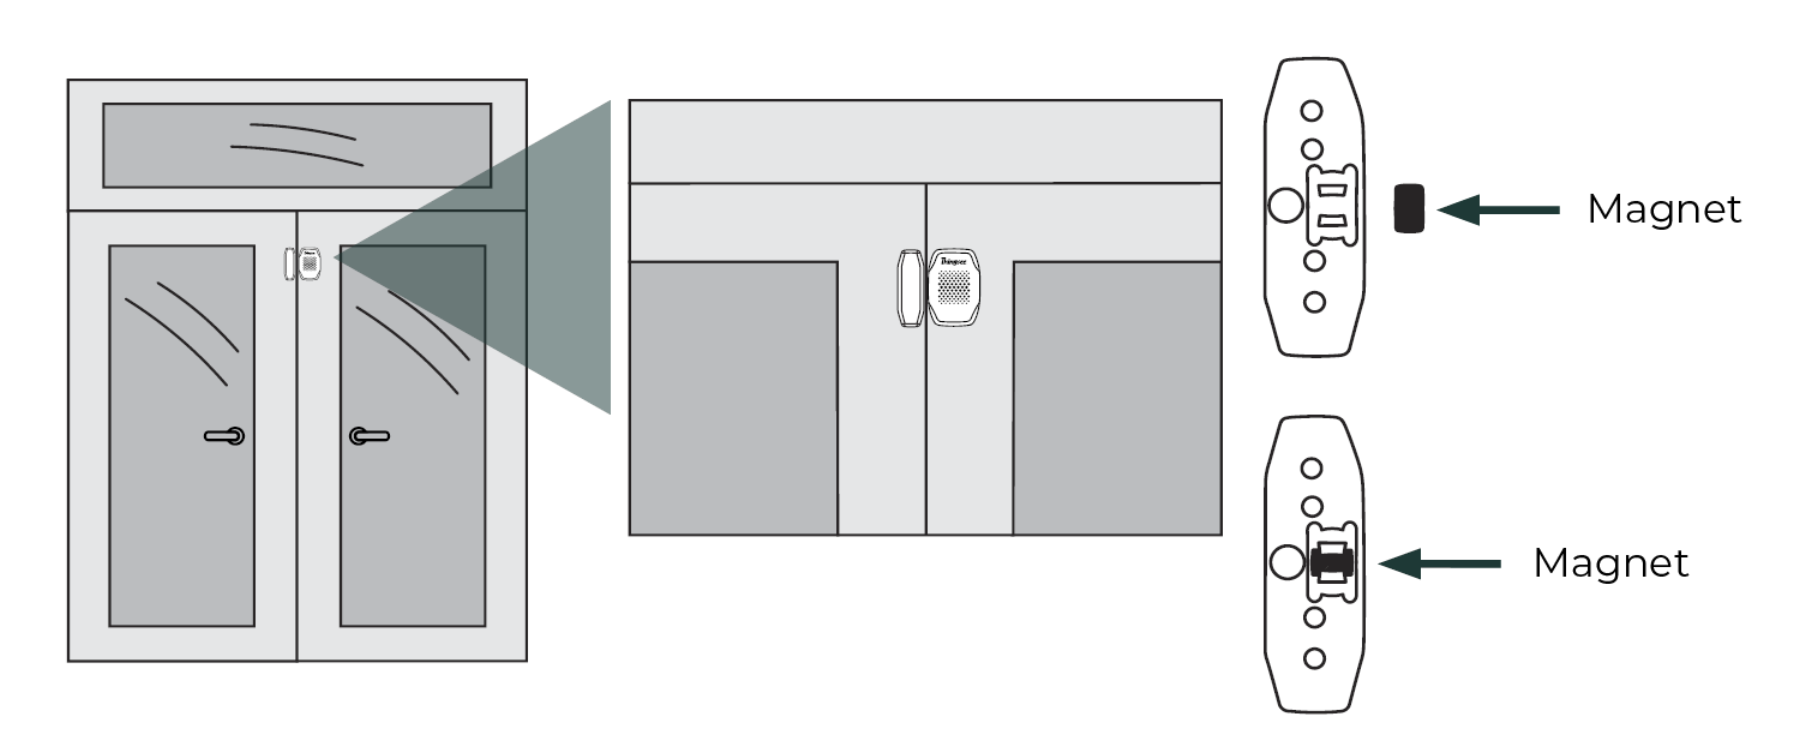
- Align sensor and magnet holder at the bottom — the magnetic switch is on the left side of the device
- Ensure a 5–15 mm gap between sensor and magnet holder when the door/window is closed
- Open and close the door several times and verify state changes in the Haltian application
Magnet Positions
The small magnet inside the magnet holder accessory is positioned to align with the magnetic switch inside the sensor. There are two valid mounting positions:
Position 1 — Magnet holder comes across the sensor from the side:
Position 2 — Magnet holder aligned alongside the sensor:
For magnetic switch detection logic and counter interpretation, see Operation — Magnetic Switch.
Machine Usage Monitoring
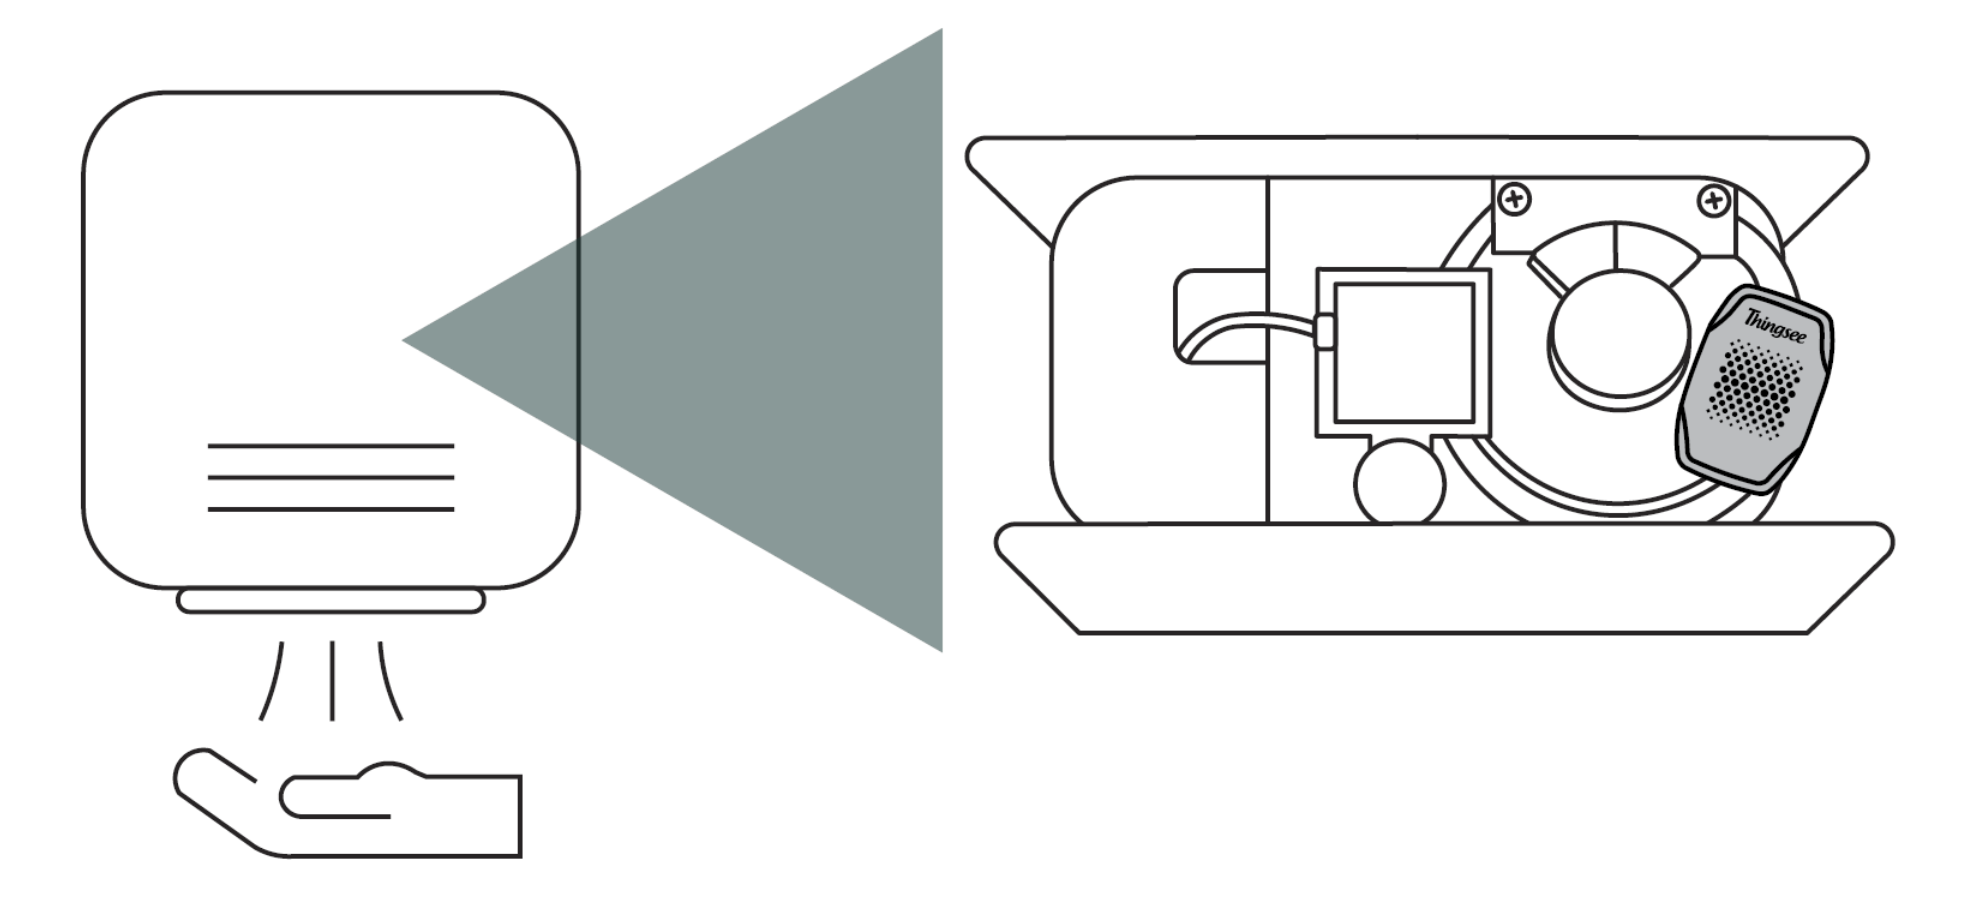
Thingsee ENVIRONMENT’s accelerometer can detect even the smallest G-forces, making it suitable for monitoring vibration of machines. Install the sensor where the vibration of the machine is felt when it is running. Attach the sensor firmly to ensure reliable vibration detection.
Installation Steps
- Select mounting location — flat surface on the equipment housing where vibration is clearly felt
- Attach the sensor firmly to the surface using adhesive tape. Ensure the surface is clean and the sensor does not wobble
- Document sensor orientation — note X, Y, Z axis orientation for consistent data interpretation across machines
- Enable Machine Usage Mode — contact support@haltian.com with the sensor ID. Support will configure the appropriate vibration range remotely. See Operation — Machine Usage Mode for details
- Test detection — run the equipment through a normal cycle and verify vibration is detected in the Haltian application
Battery Replacement
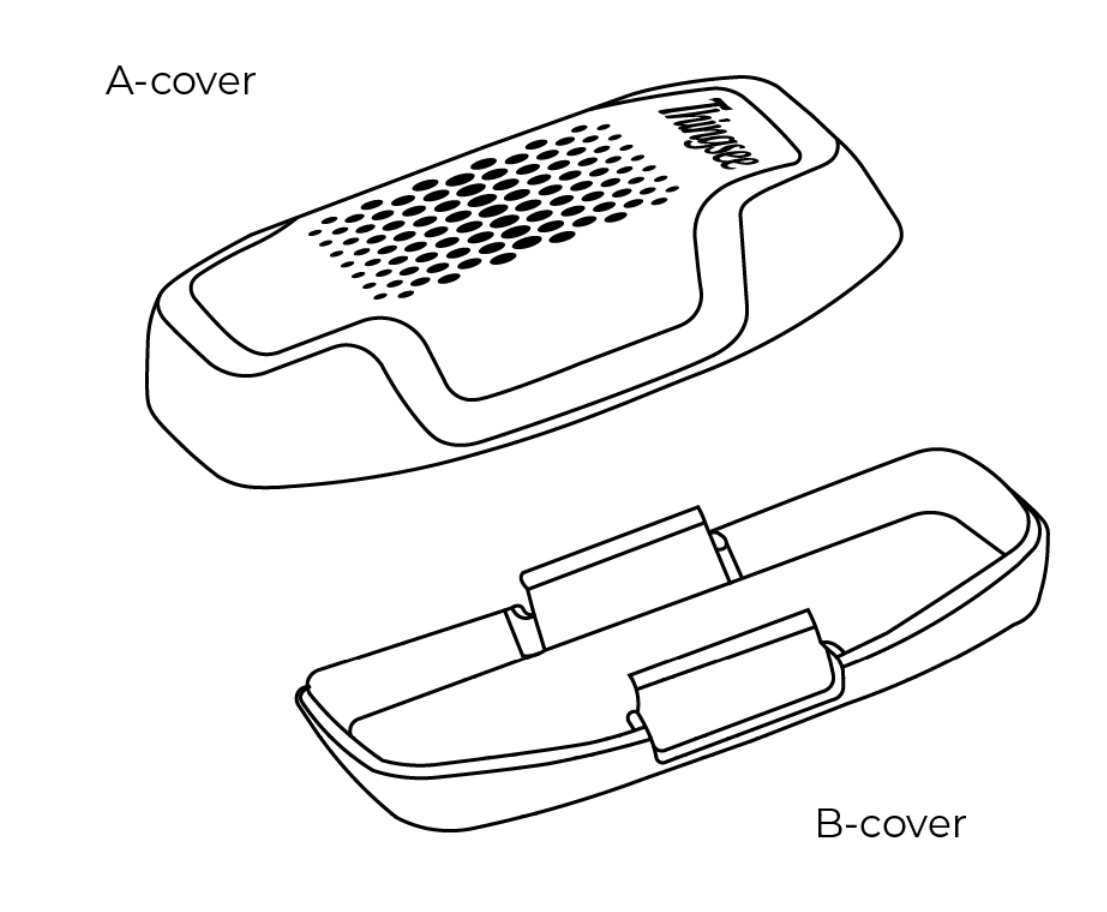
The sensor uses 2x AAA alkaline batteries. Recommended: Varta Industrial Pro 1.5V AAA LR03. Do not use lithium or rechargeable NiMH batteries.
When Holding the Sensor in Hand
- Insert the opening key in the hole on the side of the sensor and twist to open
- Separate the A-cover from the B-cover
- Place the batteries inside the A-cover, observing correct polarity
- Attach the A-cover to the B-cover (Thingsee logo upright) and press until it clicks
When the Sensor is on the Installed Surface
- Insert the opening key in the side hole and twist to release the A-cover
- Pull the A-cover away from the B-cover (B-cover remains on the wall)
- Remove old batteries and insert fresh AAA batteries, matching polarity
- Reattach the A-cover and press until it clicks securely
The device will rejoin the network automatically after battery replacement. Wait up to 10 minutes for the first data to appear.
Post-Installation Verification
Network Connection
- Wait for network join — the device automatically joins the Wirepas mesh network (typically 1–5 minutes, up to 10 minutes)
- Verify in the Haltian application — confirm the sensor appears in the device list with a recent “Last Seen” timestamp
Initial Data
- First readings (temperature, humidity, pressure, light) should appear within 5–10 minutes
- For magnetic switch: open/close the door and confirm state changes appear
- For machine usage: run equipment and confirm vibration is detected
- Verify all readings are reasonable for the environment
Signal Strength
Verify signal strength is acceptable (RSSI > -85 dBm) in the Haltian application. If signal is poor, add an intermediate sensor as router, reposition closer to the gateway, or check for physical obstructions.
For detailed RSSI ranges and network troubleshooting, see Operation — Network Health Monitoring.
Installation Checklist
- Gateway operational and connected
- Sensor identified (QR code scanned with Haltian Field)
- Battery tab pulled, LED confirmed
- Surface cleaned with IPA
- Sensor mounted within 20m of nearest sensor or gateway
- Sensor appears in the Haltian application
- Initial readings received
- Signal strength acceptable (RSSI > -85 dBm)
- Magnetic switch tested (if applicable)
- Vibration detection verified (if Machine Usage Mode)
- Sensor location and ID documented